One of science’s wonderful gifts is electricity as it lights up our TV, Fans, ACs, runs our gadgets, and what not. However, every electrical setup carries multiple risks with it like causing electrical shocks, damage to electrical appliances etc. For the same reason, installing proper earthing or grounding in electrical setups becomes mandatory. But what is Earthing? At some point of our lives we all have heard about “earthing” or “grounding” wires but what does it actually mean, though? What makes it so crucial? And what are the types of earthing?
Let’s explore the world of earthing and gain a step-by-step understanding about it in this detailed article.
What is Earthing?
Let’s consider an electrical appliance, such as a water heater or washing machine, experiencing an unexpected malfunction. Its metal body is accidentally touched by a live wire. This implies that someone could receive a potentially fatal electric shock if they come into contact with the device. Isn’t it frightening?
Here comes the role of earthing – Earthing provides a safe path for this extra current to flow into the ground, as it may pass through the body to the ground, causing potentially fatal electric shocks.
In simple words, Earthing is the process of connecting electrical equipment or systems to the ground in order to prevent electrical shocks or fire hazards to people and property.
Why is Earthing Necessary in Electrical Systems?
Earthing is important in day-to-day life as the absence of proper earthing or grounding can lead to electric shocks, appliance damage, or even loss of life:
- It diverts the fault current away from the human body hence prevents electric shock.
- It helps safely release excess charge and guards against appliance damage.
- It ensures balanced voltage levels and preserves voltage stability.
- It gives a point of reference for the electrical system’s correct operation.
What are the Basic Components used in an Earthing System?
Let’s understand what materials or components are usually involved in any earthing setup:
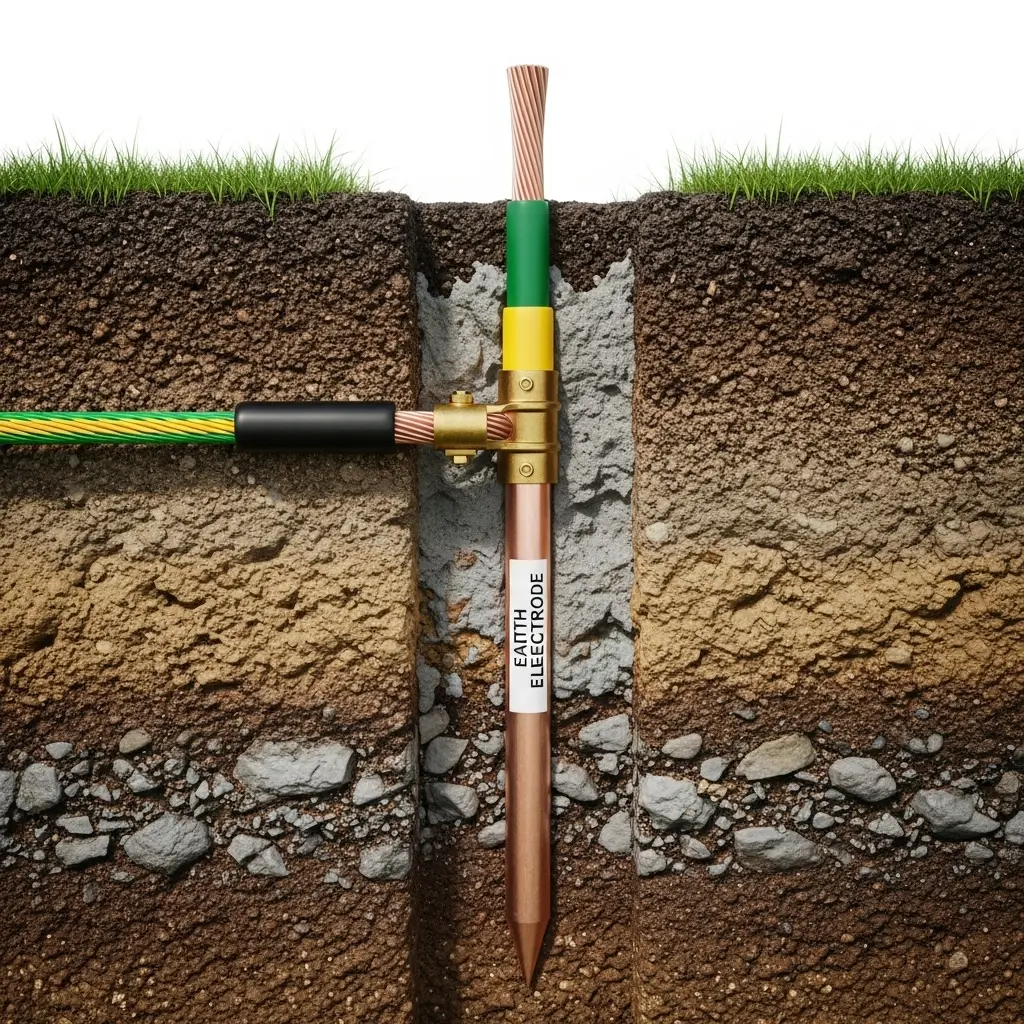
- The main component used is a metal rod, plate, or pipe that is buried in the ground which makes direct contact with the soil is called an earth electrode.
- Second one is the conductor that joins the electrical system to the ground electrode is called an earthing lead or wire.
- Other one is the electrode which is placed in an earth pit, which is a hole scooped out of the ground.
- Last but not the least, moisture and salt or charcoal are frequently added to the pit to increase the soil conductivity.
Why is My Earthing System not working properly?
There are multiple factors due to which your earthing or grounding may not work properly and identifying the underlying issues is very crucial for your electrical setups to ensure protection and avoid any tragedy. Lets discuss such issues one by one:-
- Type of soil: Check the soil where earthing is setup as sandy or rocky soils have higher resistance, which make them poor conductors and unsuitable for efficient grounding. On the other hand, Soils which are rich in clay and moisture (like black cotton soil) are excellent conductors and ideal for earthing.
- Moisture content: Check the moisture content in the soil as it greatly enhances soil conductivity. Dry soil increases resistance, which weakens the earthing system. That’s why regular watering or using backfilling compounds like bentonite or charcoal-salt is common to maintain consistent moisture.
- Temperature: As the temperature drops, especially below freezing, soil loses its ability to conduct electricity effectively. Frozen soil acts like an insulator, which can temporarily disable proper earthing unless deeper grounding is done.
- Electrode depth: As Deeper electrodes reach cooler, moister soil layers, which ensures lower resistance and more stable grounding. Surface-level installations often fail during dry seasons due to drying of the topsoil.
5 Types of Earthing
The many many types of earthing techniques utilized in real-world installations and every technique has benefits of its own and is selected according to the kind of building, the state of the soil, and safety requirements. Lets discuss each one by one.
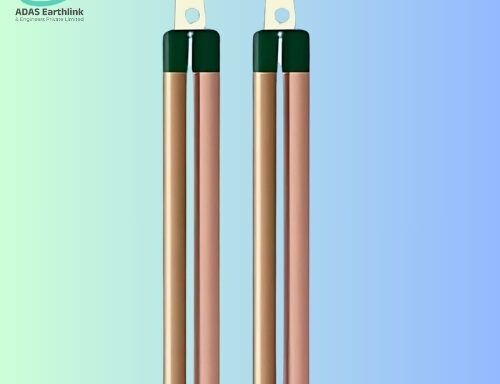
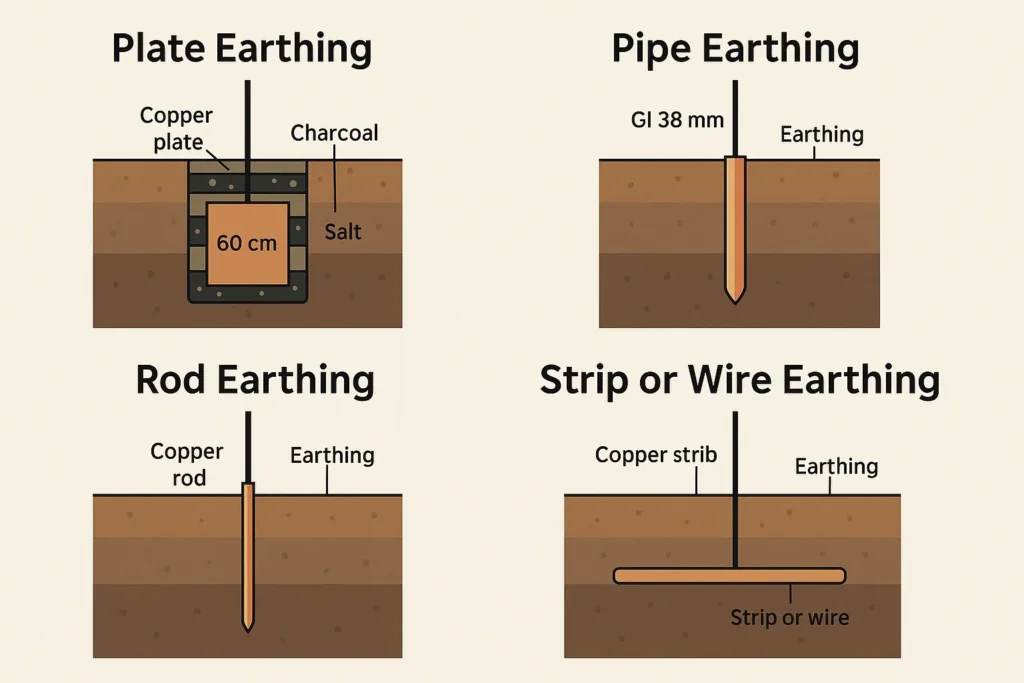
1. Plate Earthing
In both households and businesses, this is one of the most widely employed techniques. This process involves burying a copper or galvanized iron (GI) plate, typically measuring 60 cm by 60 cm, vertically in a pit between three and five feet below the surface. To improve conductivity and ensure proper earthing, salt and charcoal are added to the pit and moisture, through chemical compounds, is added on a regular basis.

2. Pipe Earthing
In this type of earthing a GI pipe (Galvanized iron) is inserted vertically into the ground which is usually 2-3 meters long and 38 mm in diameter. Holes are bored in the pipe to let moisture in. In the pit, salt and charcoal is utilized to improve conductivity. It is used in places with rocky or dry terrain and frequently found in electrical substations and power networks. This approach is very economical and efficient.

3. Rod Earthing
In Rod Earthing a solid rod made of copper or GI is driven directly into the ground. This process requires less room and is easier to install than the plates and pipes. This is a more straightforward and modern alternative.

4. Strip or Wire Earthing
In this type of earthing a strip or wire (copper or GI) is put horizontally in a trench in the ground. The conductor used in this might be many meters long. It is commonly used in power plants, transmission towers, and substations where large area of contact with the earth is required.

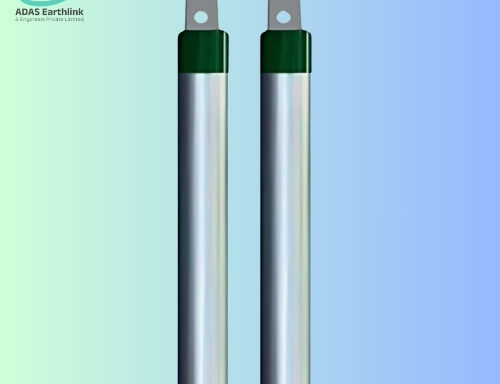
5. Chemical Earthing (Maintenance-Free Earthing)
In this type of earthing a Specially designed earthing electrodes are surrounded by chemical compounds that retain moisture while improving conductivity like GI Earthing Electrode (Strip-in-Pipe or Pipe-in-Pipe Design), Copper Bonded Earthing Electrode, Pure Copper Earthing Electrode. These electrodes require minimum maintenance and are less sensitive to soil dryness. It is used in high-rise buildings, telecom towers, sensitive electronic equipment, and dry soil locations. It’s a new and also a low-maintenance approach.
Comparison of Types of Earthing
| Type of Earthing | Material Used | Installation Depth / Layout | Conductivity Enhancers | Maintenance Level | Common Applications |
|---|---|---|---|---|---|
| Plate Earthing | Copper or GI Plate (60×60 cm) | Buried vertically, 3–5 feet or more | Charcoal and salt | Medium | Homes, offices, small industries |
| Pipe Earthing | GI Pipe (38 mm dia, 2–3 m long) | Inserted vertically into ground (up to 9 feet) | Charcoal and salt | Medium | Dry soil areas, power stations, substations |
| Rod Earthing | Copper or GI Rod | Driven directly into the earth (depth varies) | None or minimal | Low | Temporary setups, small buildings |
| Strip/Wire Earthing | Copper or GI Strip/Wire | Laid horizontally in trenches | Not required | Medium | Transmission lines, substations, large areas |
| Chemical Earthing | Copper/Alloy Rod + chemical compound | Buried 6–10 feet with backfill compound | Bentonite, graphite, etc. | Very Low | Telecom towers, IT parks, dry soil regions |
Step by Step Process of Earthing Installation
Earthing installation is more than just burying a metal rod in the ground; it’s a meticulous process that ensures safety, conductivity, and long-lasting performance. Here’s how it’s typically done, step by step:
Step 1: Site Selection
Site plays a key role in earthing process as the performance of earthing is heavily dependent on the soil, its moisture and temperature such as moist, loamy, or clayey soil conducts good electricity more efficiently than dry or rocky soil. You must be wondering than how to select a good site? A good site selection can be done by making sure of these things:-
- Select a location away from foundations and pipelines.
- Ensure that the area is free of high-resistance dry or sandy soil.
- For optimal natural conductivity, use a dark or wet environment.
Step 2: Digging the Earth Pit
Digging earth pit is basically done to make space for the earthing electrode (plate, pipe, or rod).
Typical dimensions are:
- Plate Earthing: It can be 3 to 5 feet wide by 6 to 10 feet deep.
- Pipe/Rod Earthing: Dig a vertical bore hole about 2-3 meters deep.
Tip: The electrode’s depth increases its interaction with moisture-rich soil.
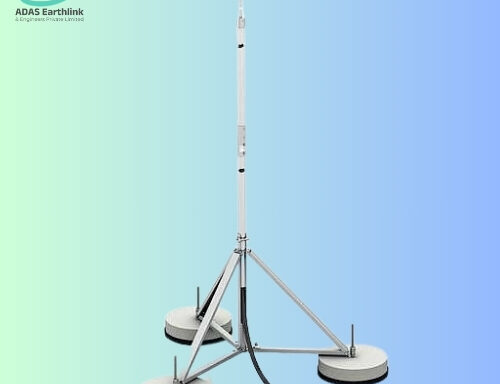
Step 3: Installing the Earth Electrode
This is the most important step of the installation process as earthing electrode is the core component of any earthing system and has a physical connection between the electrical system and the ground. Inserting the appropriate electrode based on the type of earthing.
- For plate earthing, use a copper or galvanized iron plate of 60 cm by 60 cm, place it vertically in the center of the pit.
- For pipe earthing, use a 38 mm diameter GI pipe with drilled holes for water absorption, insert vertically into the pit.
- for Rod Earthing, drive a copper or GI rod directly into the ground.
Step 4: Layering with Salt and Charcoal
Layering is done to increase soil conductivity and decrease resistance. The electrode in the pit is surrounded by alternate layers of salt and charcoal (or bentonite for modern chemical earthing) until the pit is full or the target level is met. Salt absorbs moisture and promotes ion exchange, whereas charcoal holds moisture and improves conductivity.
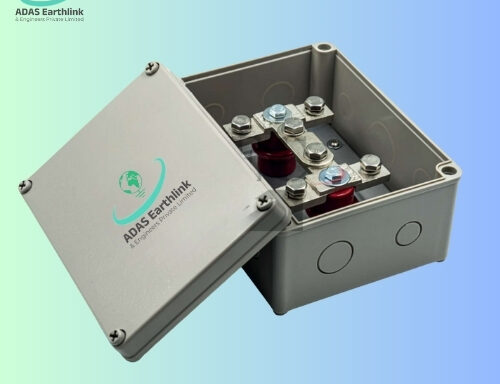
Step 5: Connecting the Earth Wire
This is done to connect the electrode to the electrical panel, using a copper strip, wire, or GI wire. Clamps, nuts, and bolts are used to tightly secure the connection and wires are insulated properly.
Step 6: Backfilling the Pit
In this step the pit is filled with dug-out soil (or black soil), adding extra salt and charcoal as needed, making sure there are no air gaps in it.
Step 7: Moisture Maintenance (Watering)
To keep the pit moist, water is poured on it on a regular basis, particularly during dry seasons/summers. Water is directly poured into a funnel or pipe opening to earth the pipe.
Step 8: Earthing Chamber & Cover
In this step a masonry chamber (brick or concrete) is build on top of the electrode region and a cover labelled as “Earth Pit” is installed for convenient access and inspection.
Step 9: Testing the Earth Resistance
In this final step, using an earth resistance tester (megger), earth resistance is verified and make sure that normal installations have a resistance of less than 5 ohms and for critical structures such as data centers, hospitals, or telecom towers the resistance should be less than 1 ohm.
Looking for reliable and long-lasting earthing solutions? Whether it’s a residential building, industrial unit, data center, or hospital — we specialize in safe, certified, and low-resistance earthing installations that meet all safety norms. Get in touch now!
Safety Checklist for Earthing
- Always use certified electrodes, wires, and backfilling compounds (e.g., GI, copper, BFC) from trusted suppliers and avoid substandard materials.
- Earth electrodes must be installed at the recommended depth to reach stable moisture levels and reduce resistance and remember “shallow installations” reduces effectiveness.
- Use a megger (earth resistance tester) periodically.
- In dry soil, use bentonite or chemical compounds to retain moisture and maintain low resistance year-round.
- Ensure all connections to the electrode are tightly secured with clamps, bolts, and nuts.
- Insulate exposed parts to avoid corrosion or accidental contact.
- Don’t connect different types of metals (e.g., copper with aluminum) directly as it causes galvanic corrosion, weakening the system over time.
- Earthing pits should not be installed too close to underground water pipelines or gas lines to prevent hazards.
- Always install pits with a cover (FRP/RCC/Cast Iron) so they remain inspectable and refillable when needed.
- Especially in critical installations, ensure all earthing points are clearly labeled and mapped for future maintenance or emergency reference.
- Especially for industrial and critical sites, make earthing checks a mandatory part of annual electrical maintenance.
Conclusion
Earthing is a life-saving precaution that protects people, property, and electrical equipment in addition to being a technical need. An important first step in guaranteeing electrical safety in residences, workplaces, and public areas is to invest in a quality earthing system and always use certified electrodes, wires, and backfilling compounds (e.g., GI, copper, BFC) from trusted suppliers like ADASEarthlink.